From Photo to Forbidden Chair: A Playful Workflow in Vizcom
Educator Claas Kuhnen documented an experimental workflow using Vizcom to transform a basic chair into dozens of variations, treating it like a character with different emotions and forms. Using multi-view 3D, Live Render, and Modify features, he moved from photos to expressive forms to 3D-printed prototypes entirely within Vizcom.
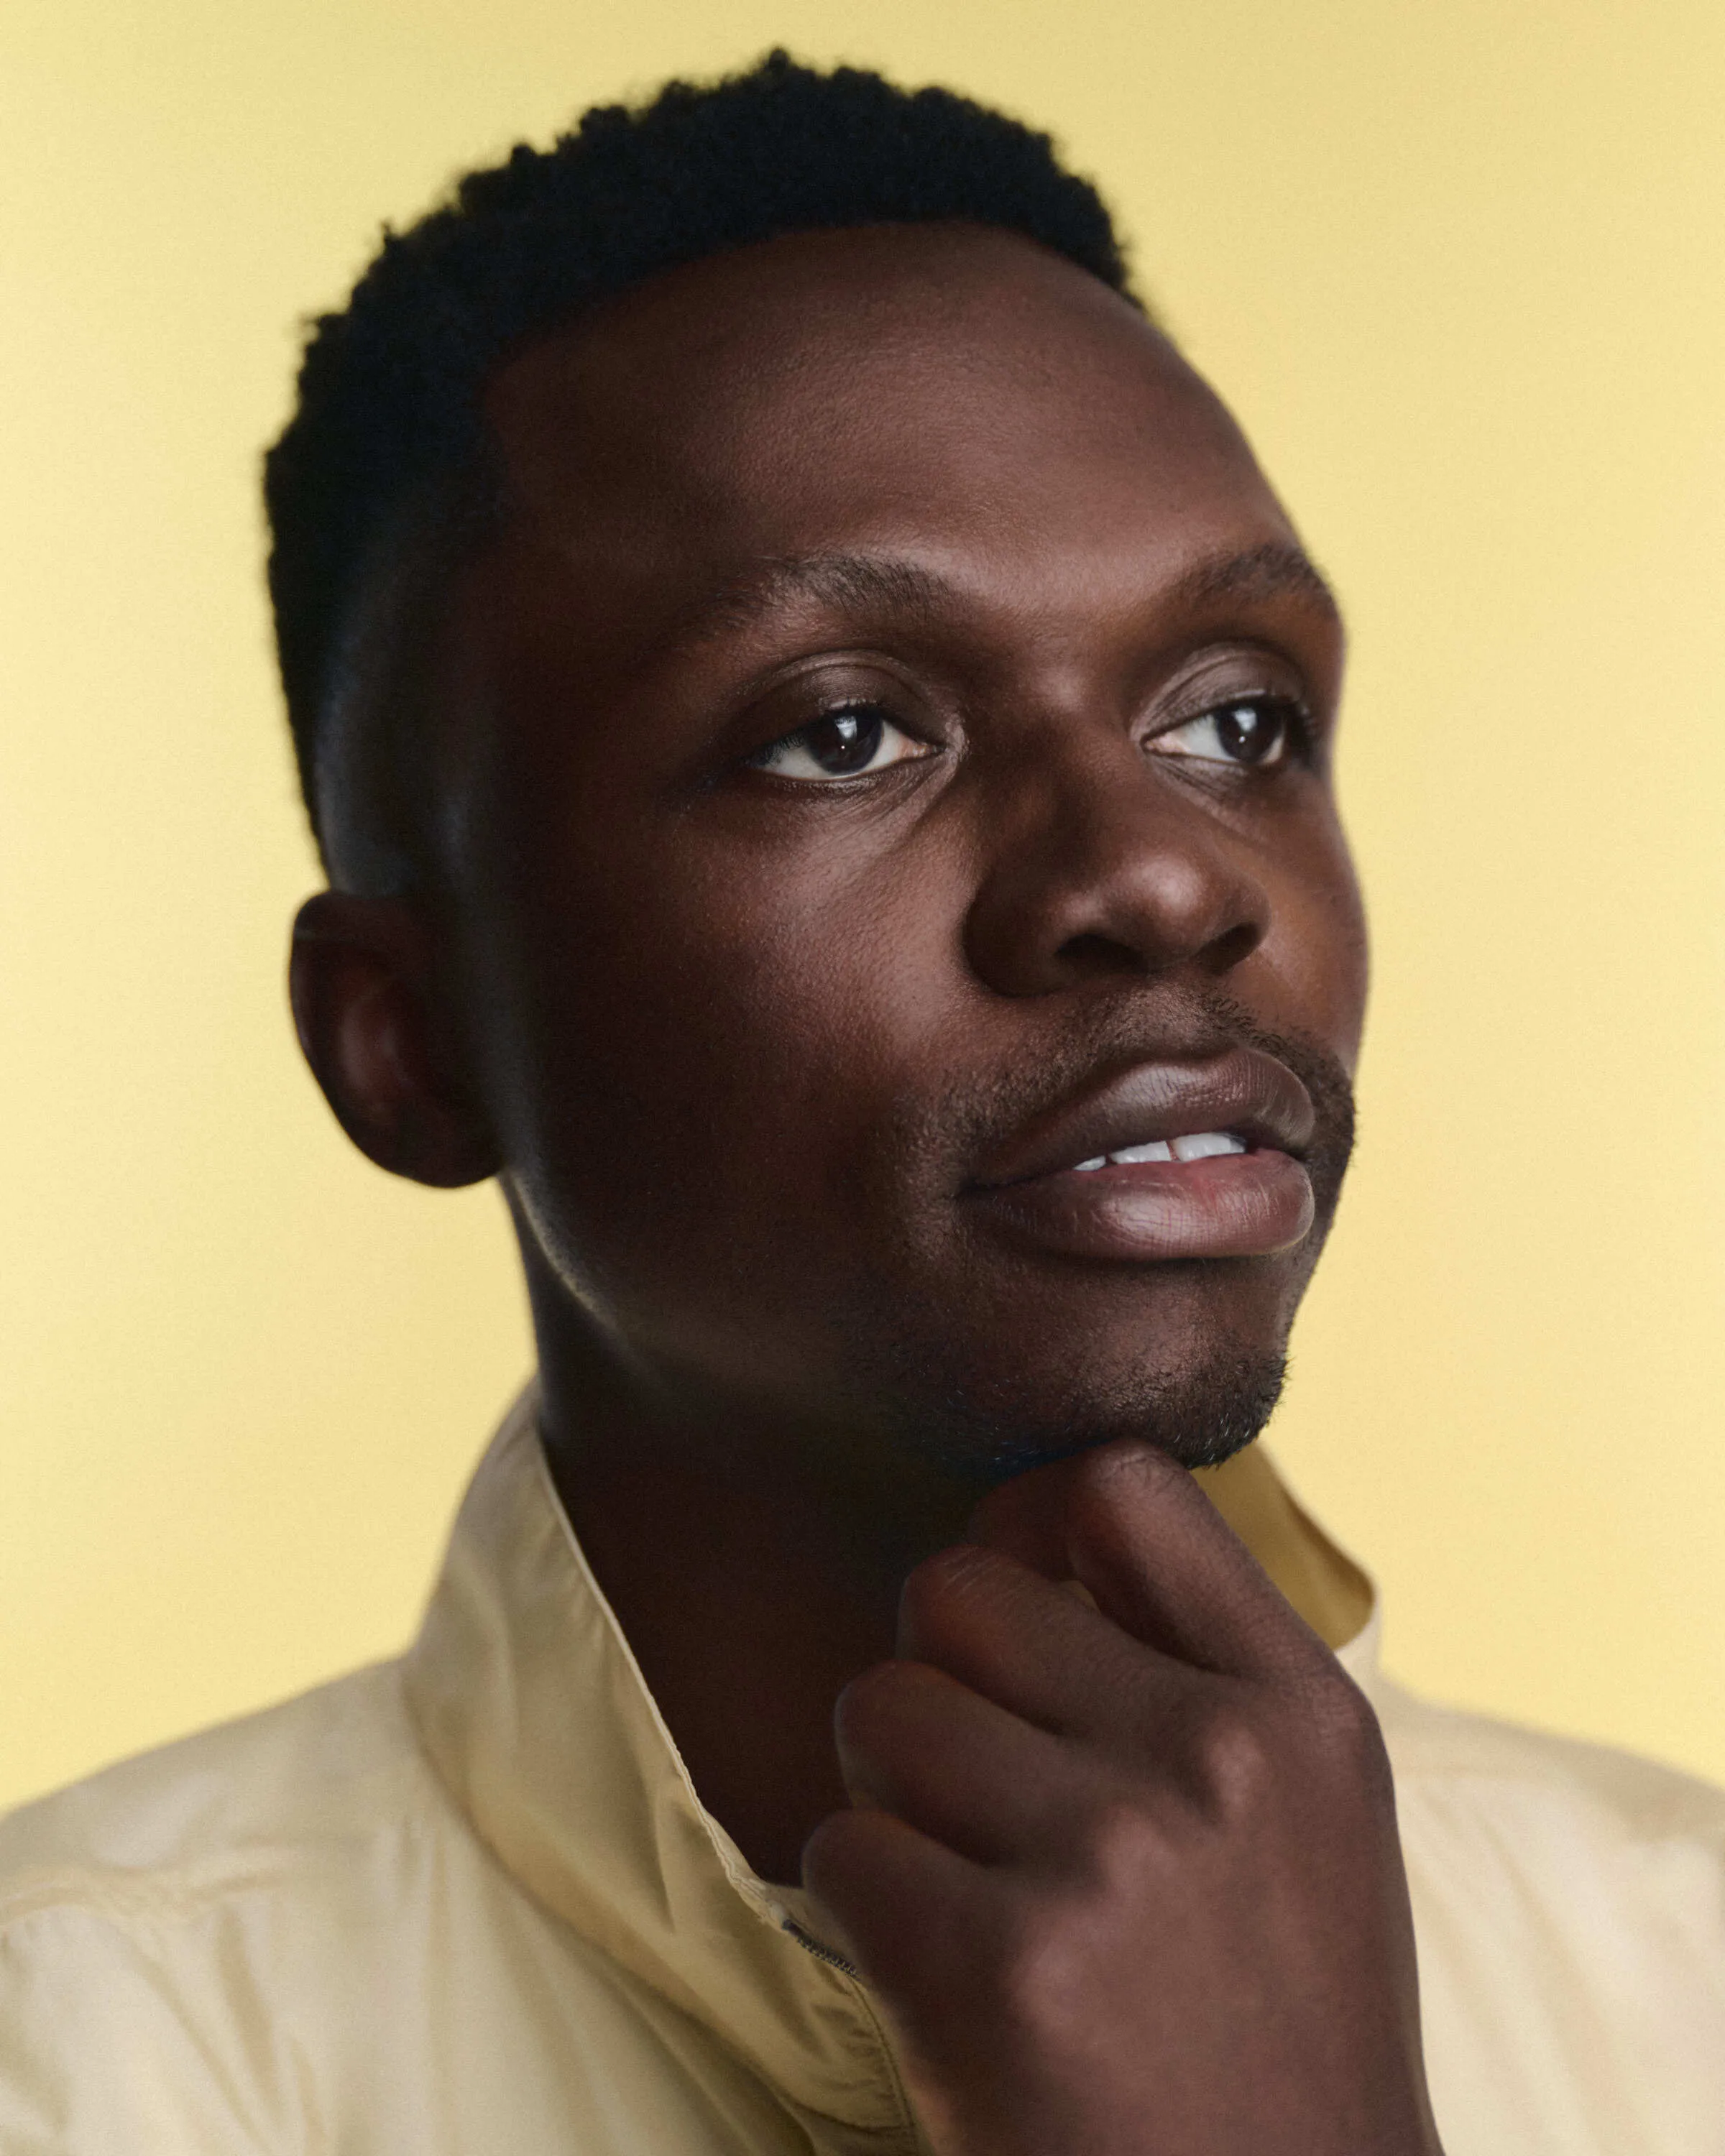
Meet the Designer
Claas Kuhnen is an educator, designer, and technologist who blends industrial, graphic, and jewelry design with a deep curiosity for emerging tools. Based in Michigan, Claas teaches at Wayne State University where he leads the Interior Design area and focuses on human-centered design and advanced 3D workflows.
Claas has modernized the Interior Design program at Wayne State, positioning it at the intersection of interior architecture and industrial design. He regularly connects students with local industry and international partners, ensuring they graduate with both technical fluency and global perspective.
What Happens When You Give a Chair an Attitude?
In a recent project, Claas asked a playful question.
What happens when you treat a chair like a character?
Using Vizcom’s multi-view 3D tool, Live Render, and the Modify interface, he took a basic chair and transformed it into a family of new forms. Some were elegant. Some were absurd. One, in his words, became the “forbidden chair.”
The Workflow: From Everyday Photos to Expressive Forms
1. Start with Real Photos
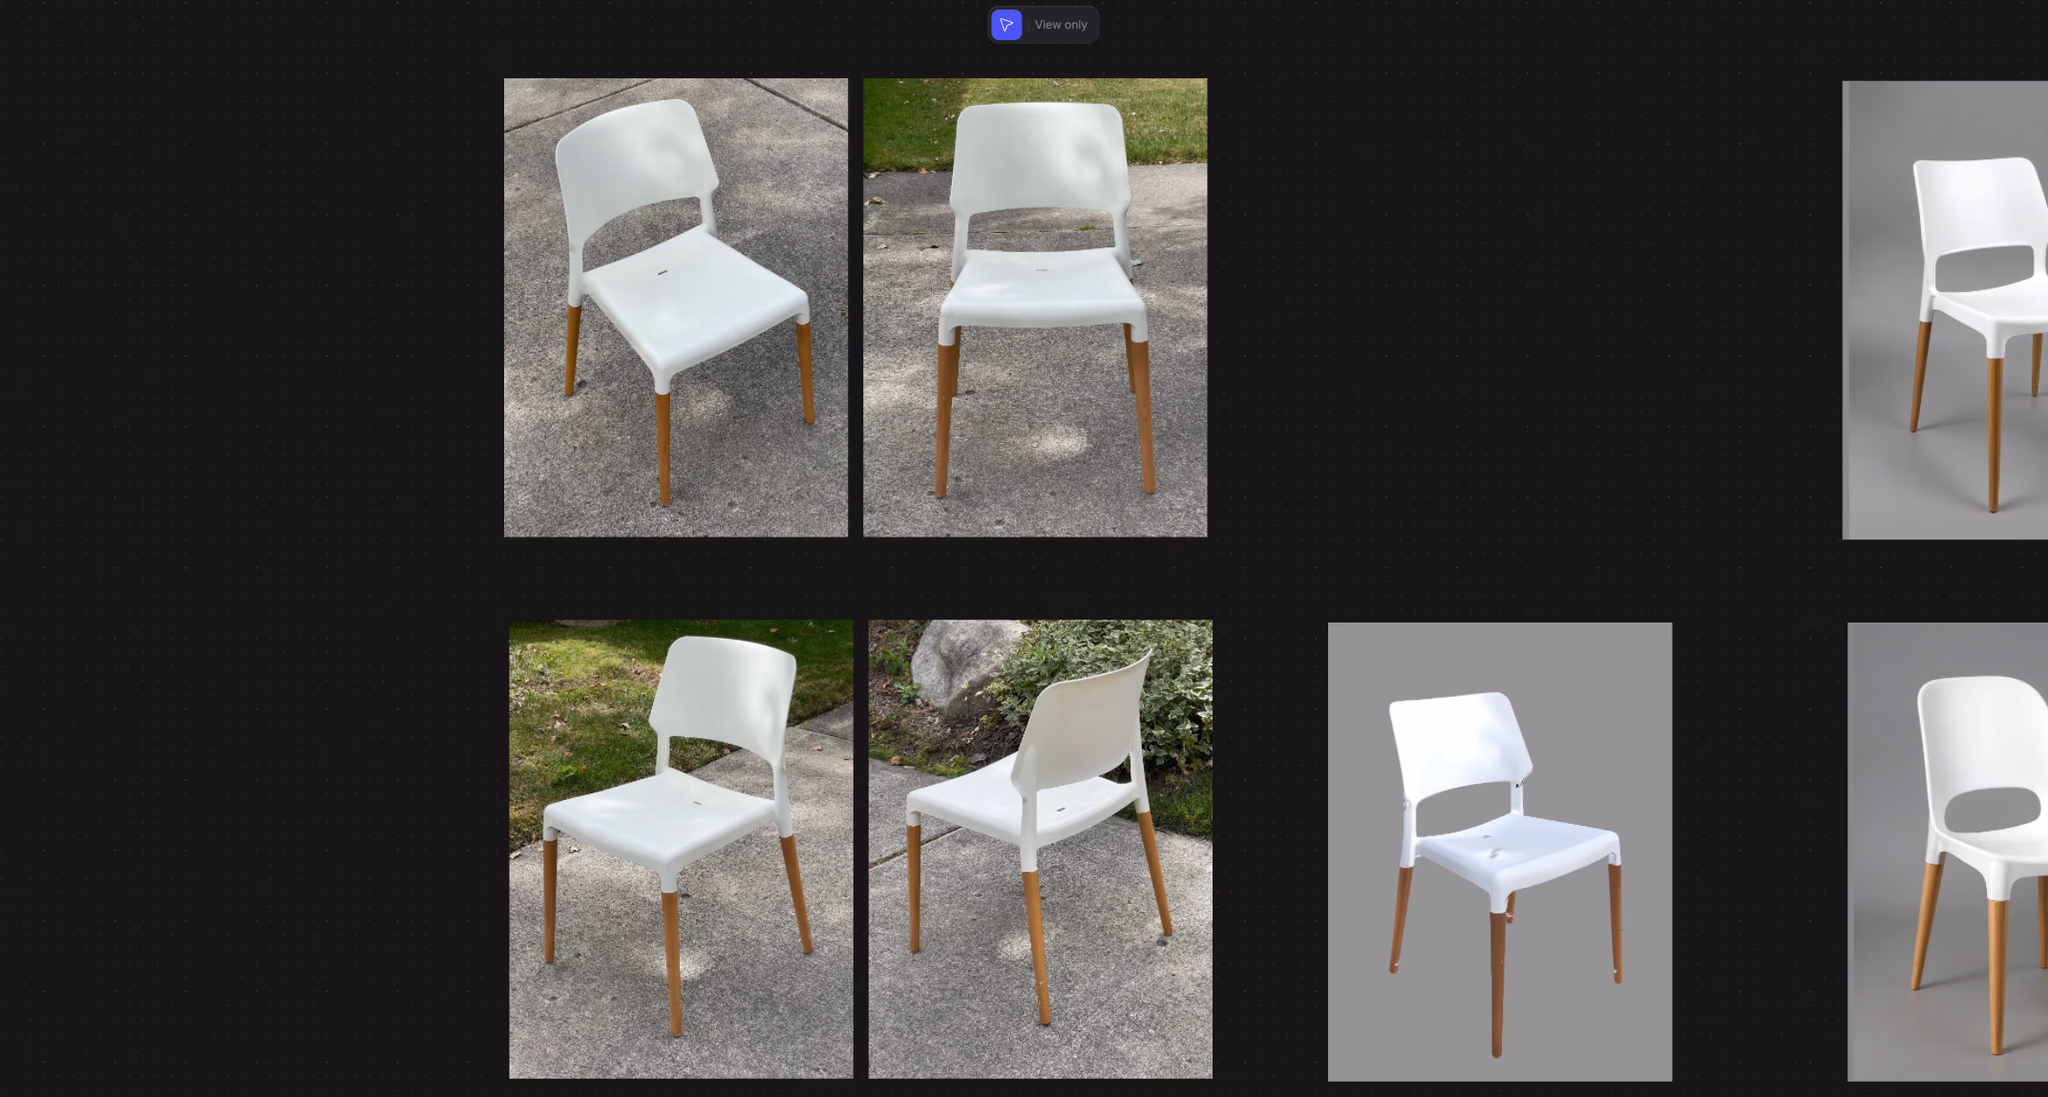
Claas began by photographing the same chair on two different days with two lighting setups. After uploading them to Vizcom, he picked five distinct angles to help generate a solid 3D model.
Soft lighting created better results by reducing harsh shadows and helping the mesh capture smooth surfaces and clean transitions.
2. Generate a 3D Model in Vizcom
Inside Vizcom’s workbench, Claas grouped his photos and ran Create 3D from Multi-View. The output was a detailed mesh of the chair that could be rotated, posed, and edited. He compared the results from each lighting setup and chose the softer one for better material definition.
3. Add Materials
He rotated the model to a strong angle and used Live Render to apply basic materials. The description was minimal:
“white plastic, brown wooden legs, gray background.”
He used the Drawing Influence slider to guide how closely the render followed the model’s shape, and the Palette Influence slider to manage how much of the original colors stayed in the output. This helped him experiment with subtle changes to form and surface without losing control.
4. Clean Up and Enhance
Claas used the Enhance button to refine noisy live renders. With the Magic Eraser and Brush tool, he cleaned up artifacts, filled gaps, and prepped the model for more dramatic edits. He widened surfaces and painted new areas to guide the AI toward more refined results.
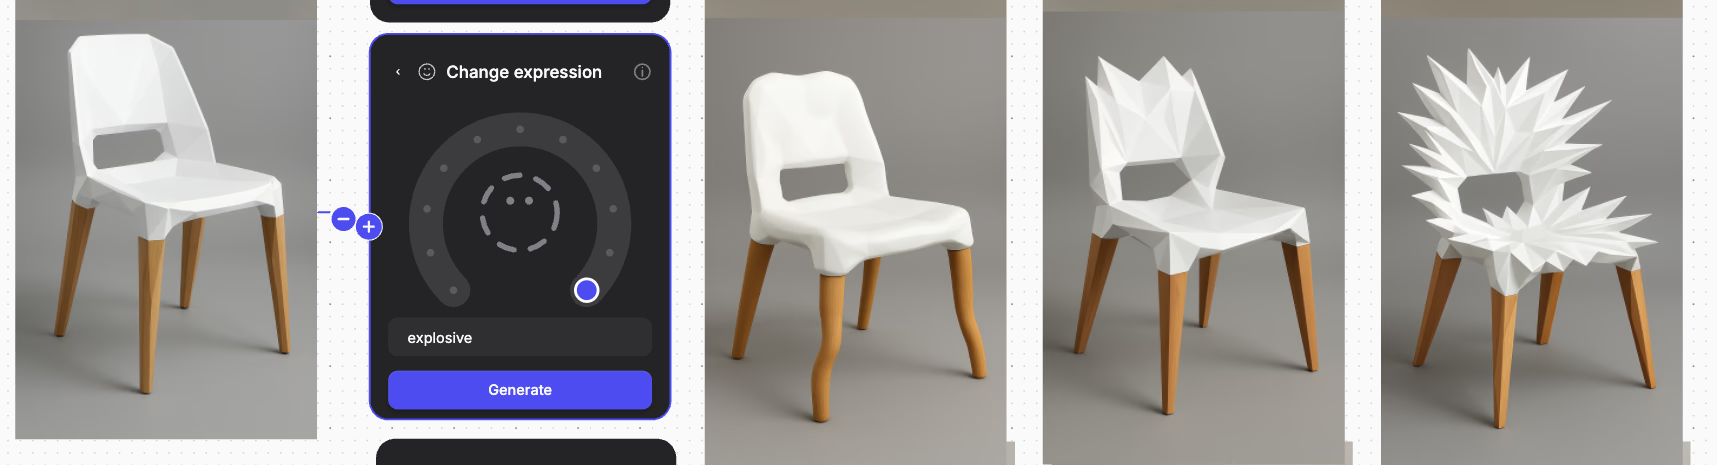
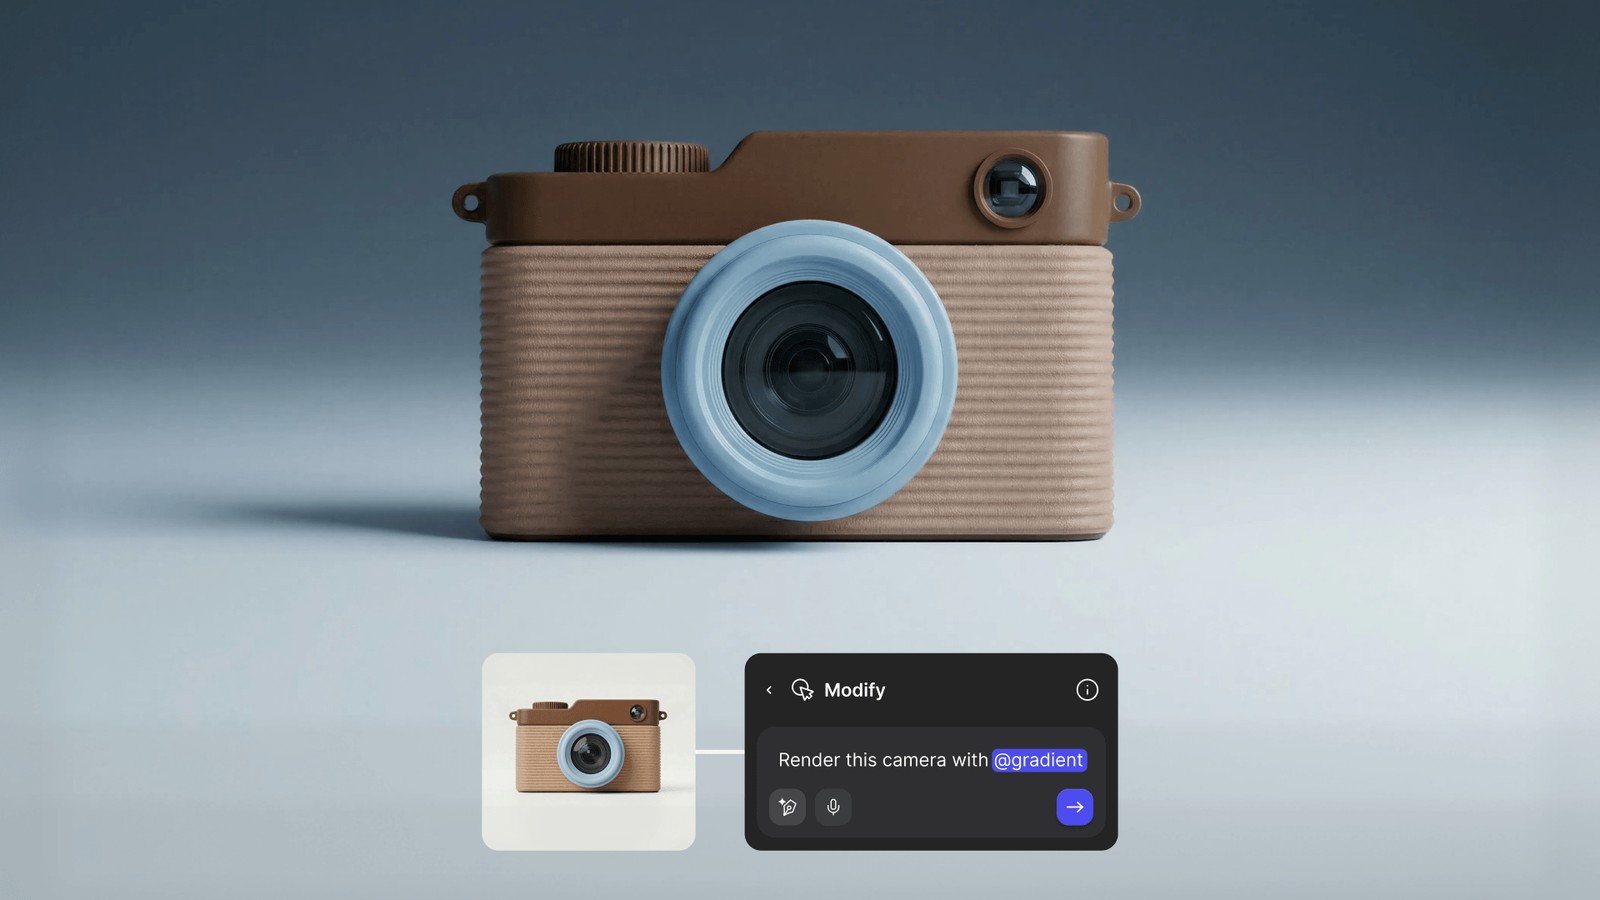
5. Use Modify to Explore Form Language
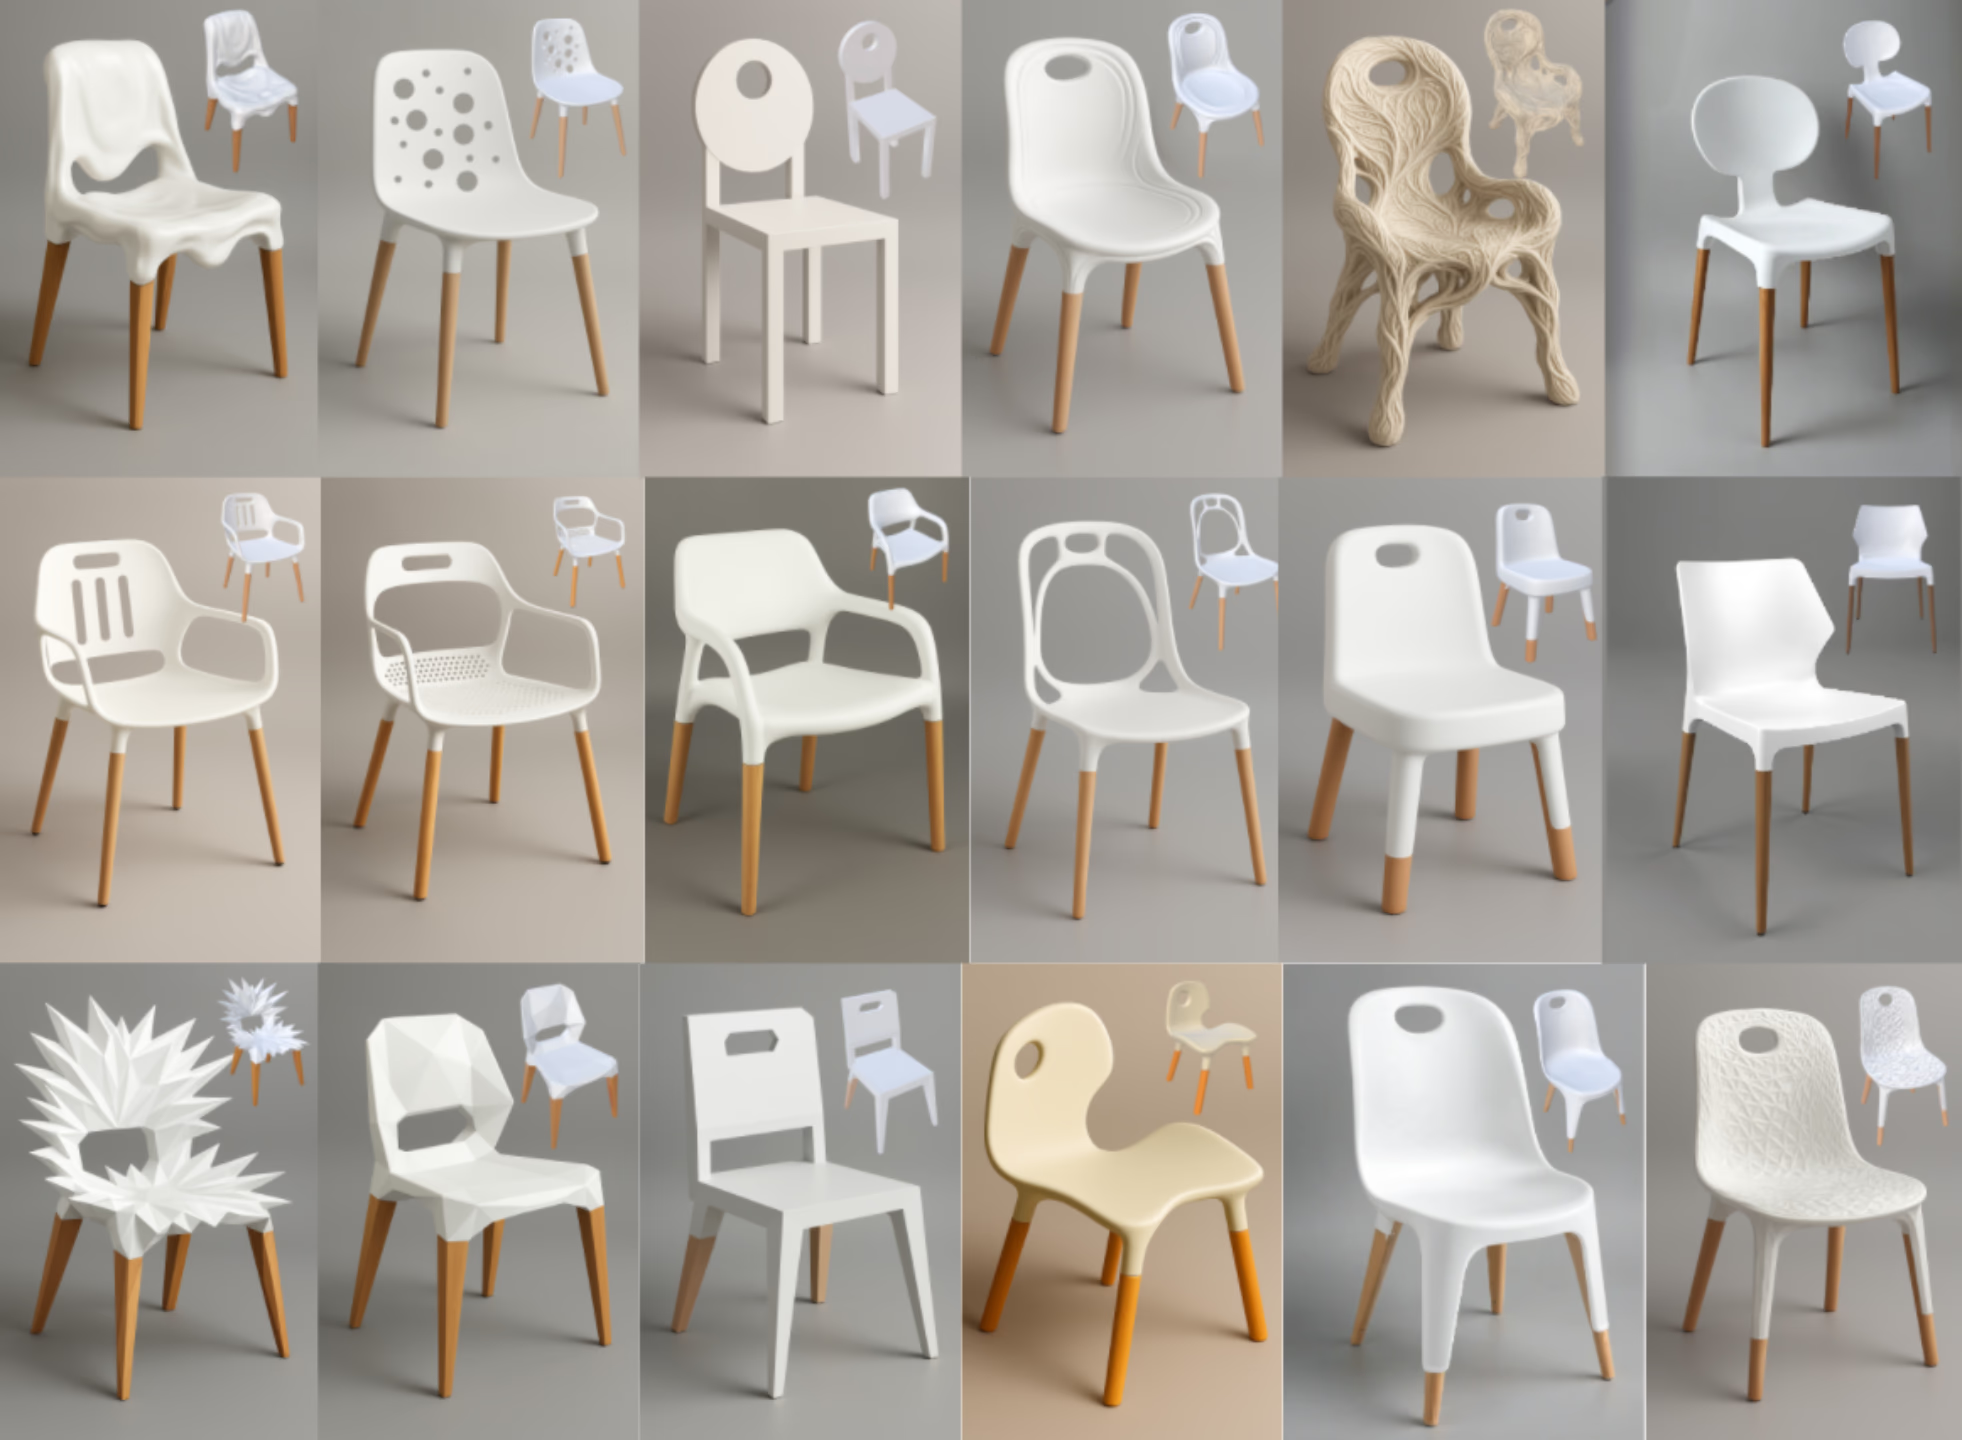
Here’s where things got fun. With Change Expression inside Vizcom’s Modify tool, Claas started assigning emotional traits to the chair.
He typed in prompts like:
- Exploding
- Melting
- Luxurious
- Hippie
- Broken
He also used sliders to test shape shifts along axes like soft to sharp, symmetrical to asymmetrical, airy to dense, and organic to geometric.
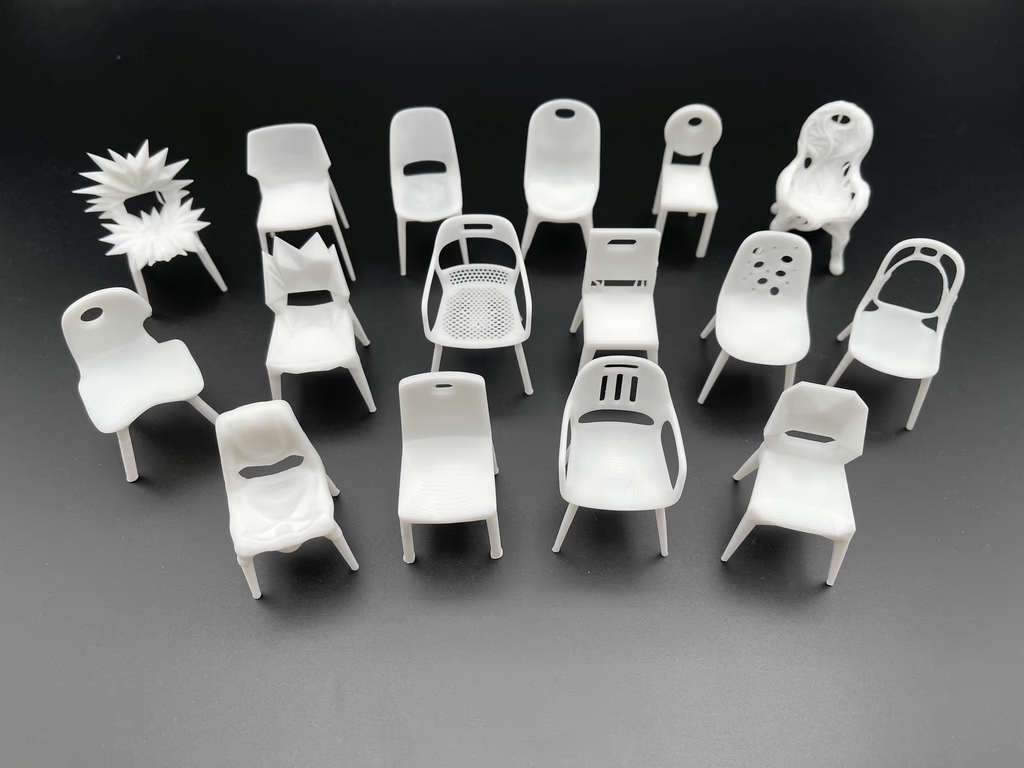
Each change generated a new version of the chair, often surprising and sometimes hilarious. One chair looked like a burst of shards. Another sagged like it was too tired to be a chair at all.
Claas saved his favorites, enhanced the clean ones, and started branching those into new iterations.

In Claas’s Words:
“I never thought about using expression for objects. But why not?”
This mindset is exactly what makes Vizcom a useful creative companion. It invites play, encourages iteration, and rewards curiosity.
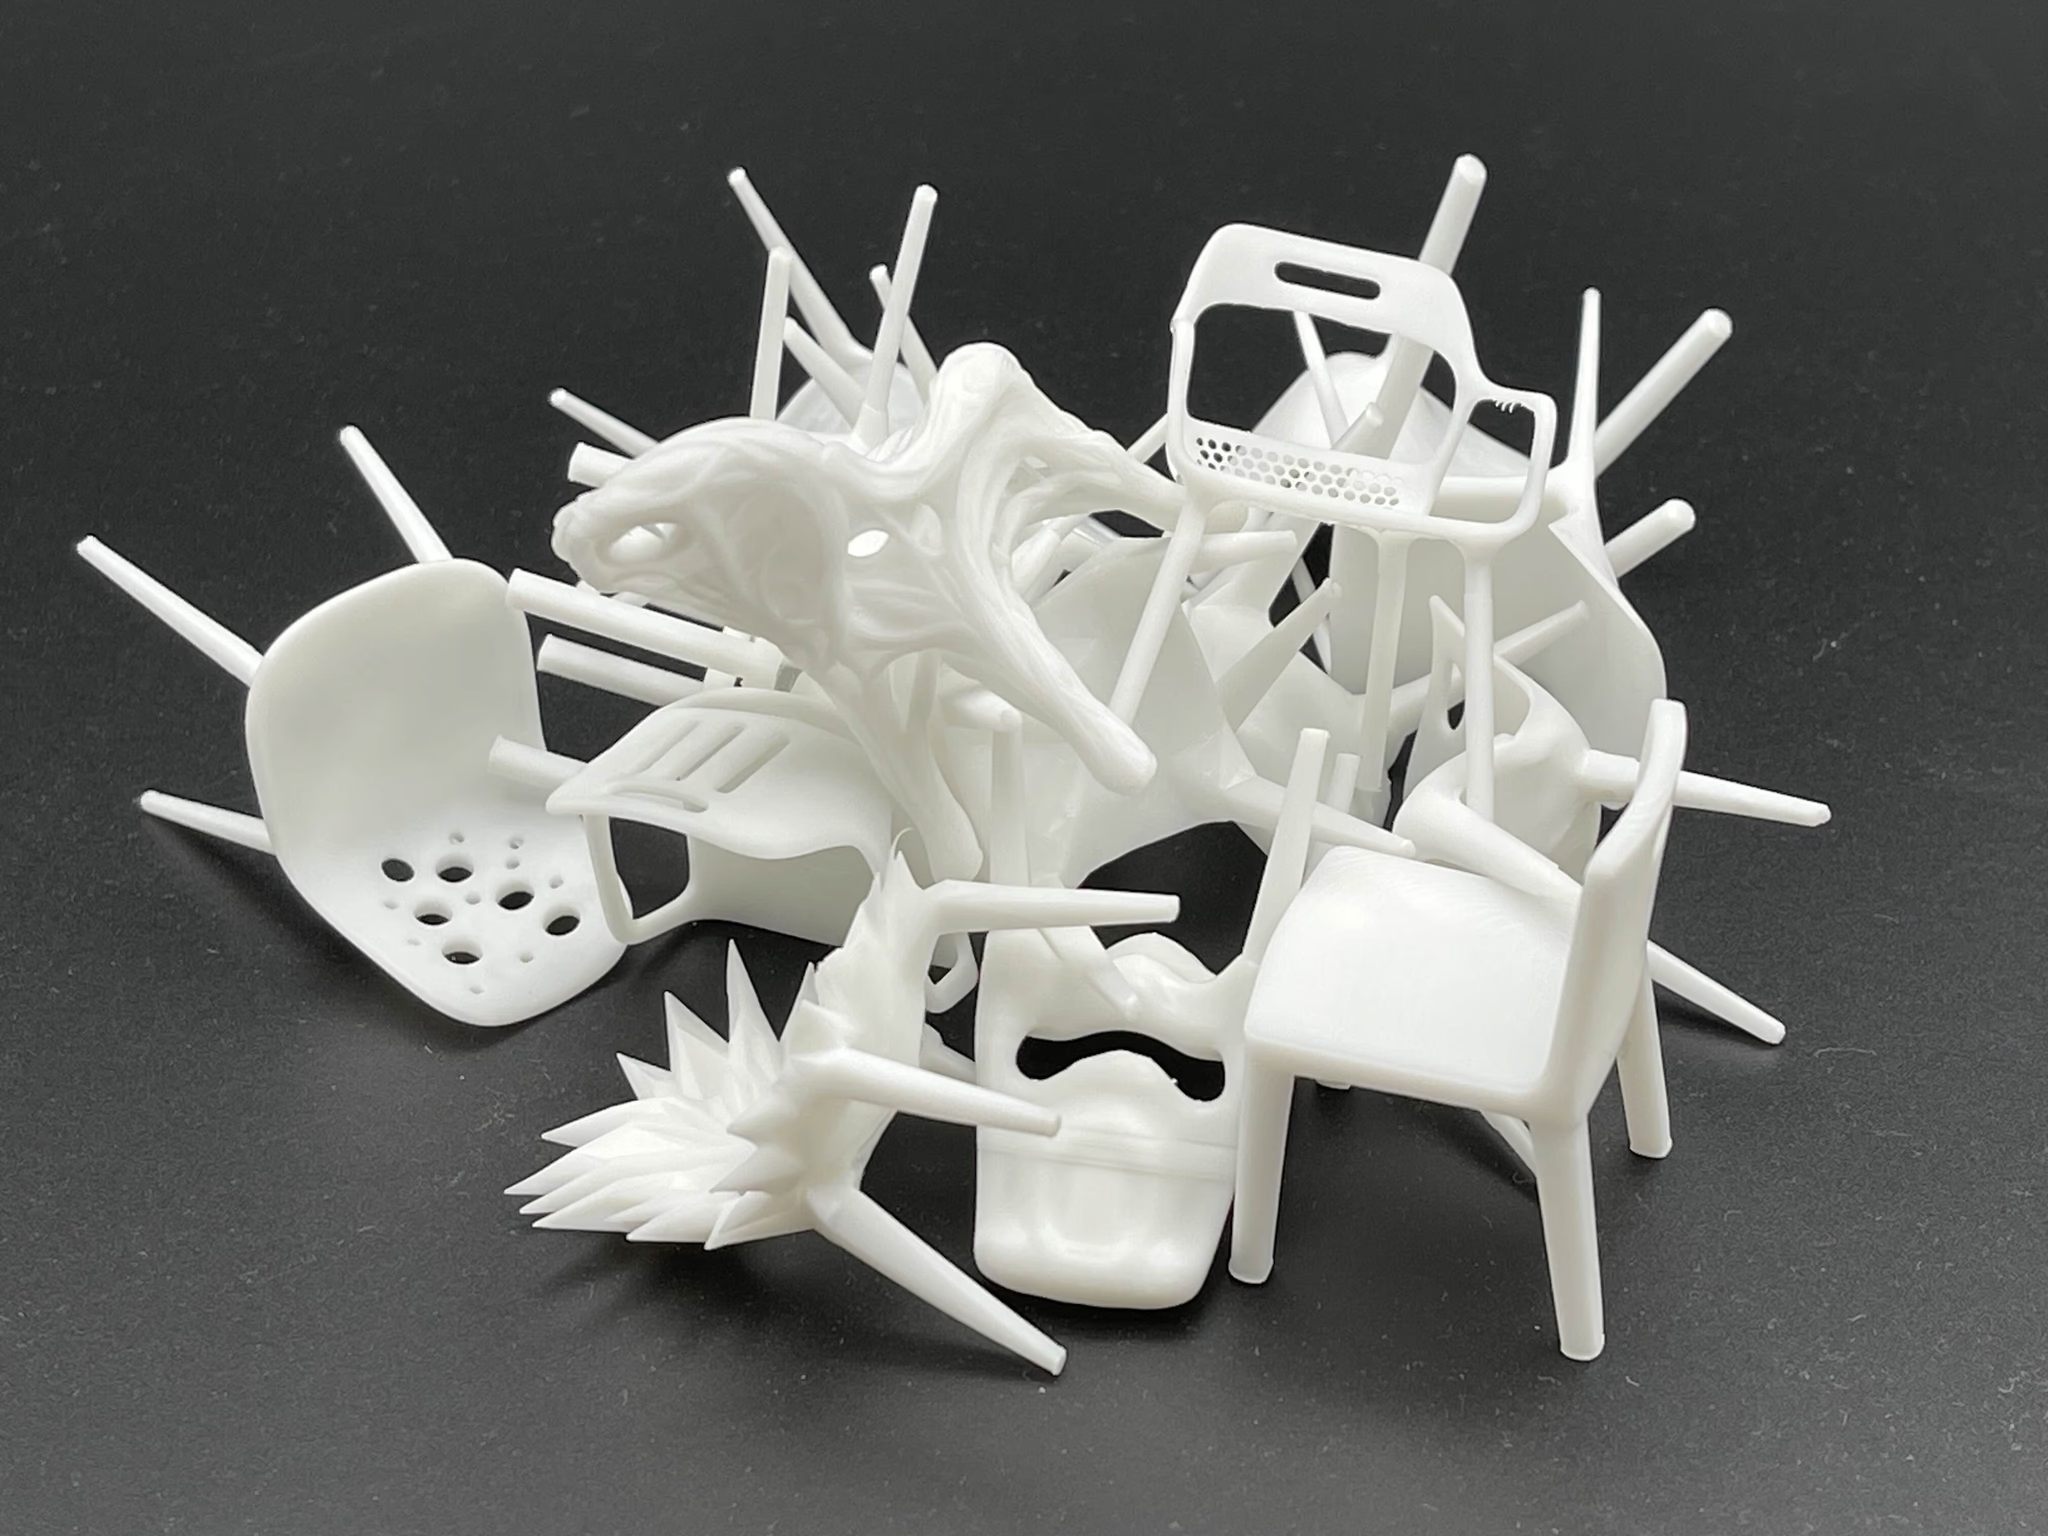
6. Crossing into the Physical World
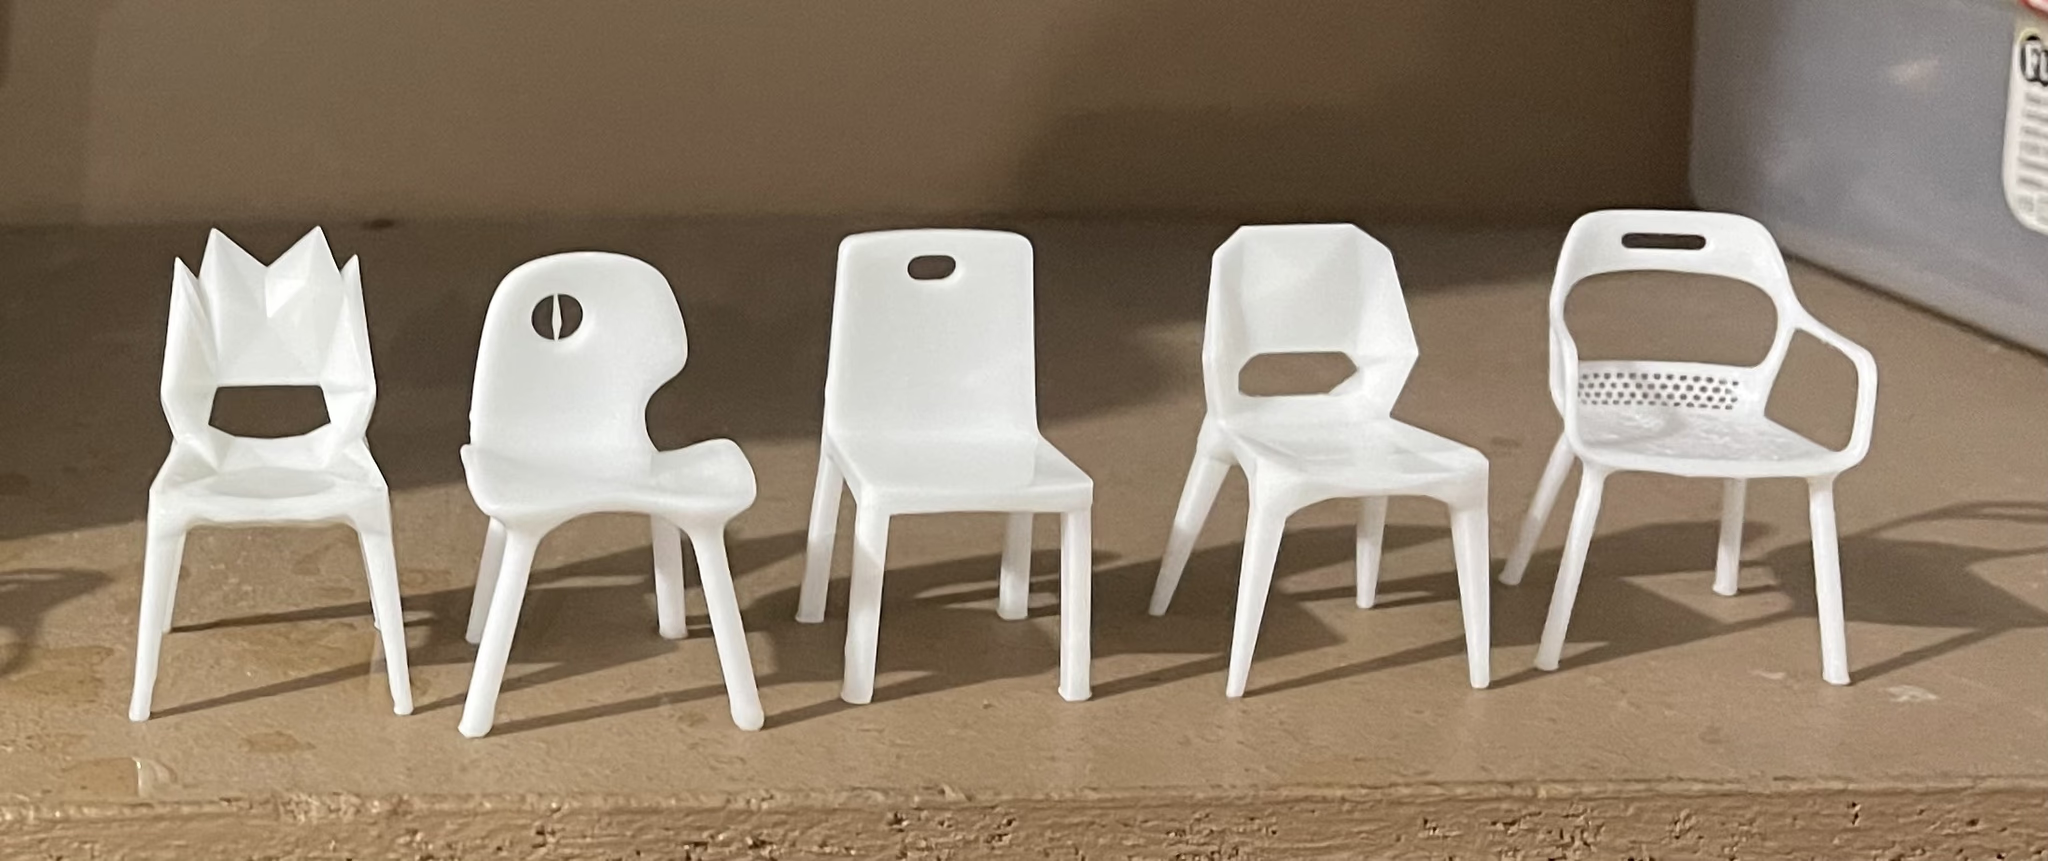
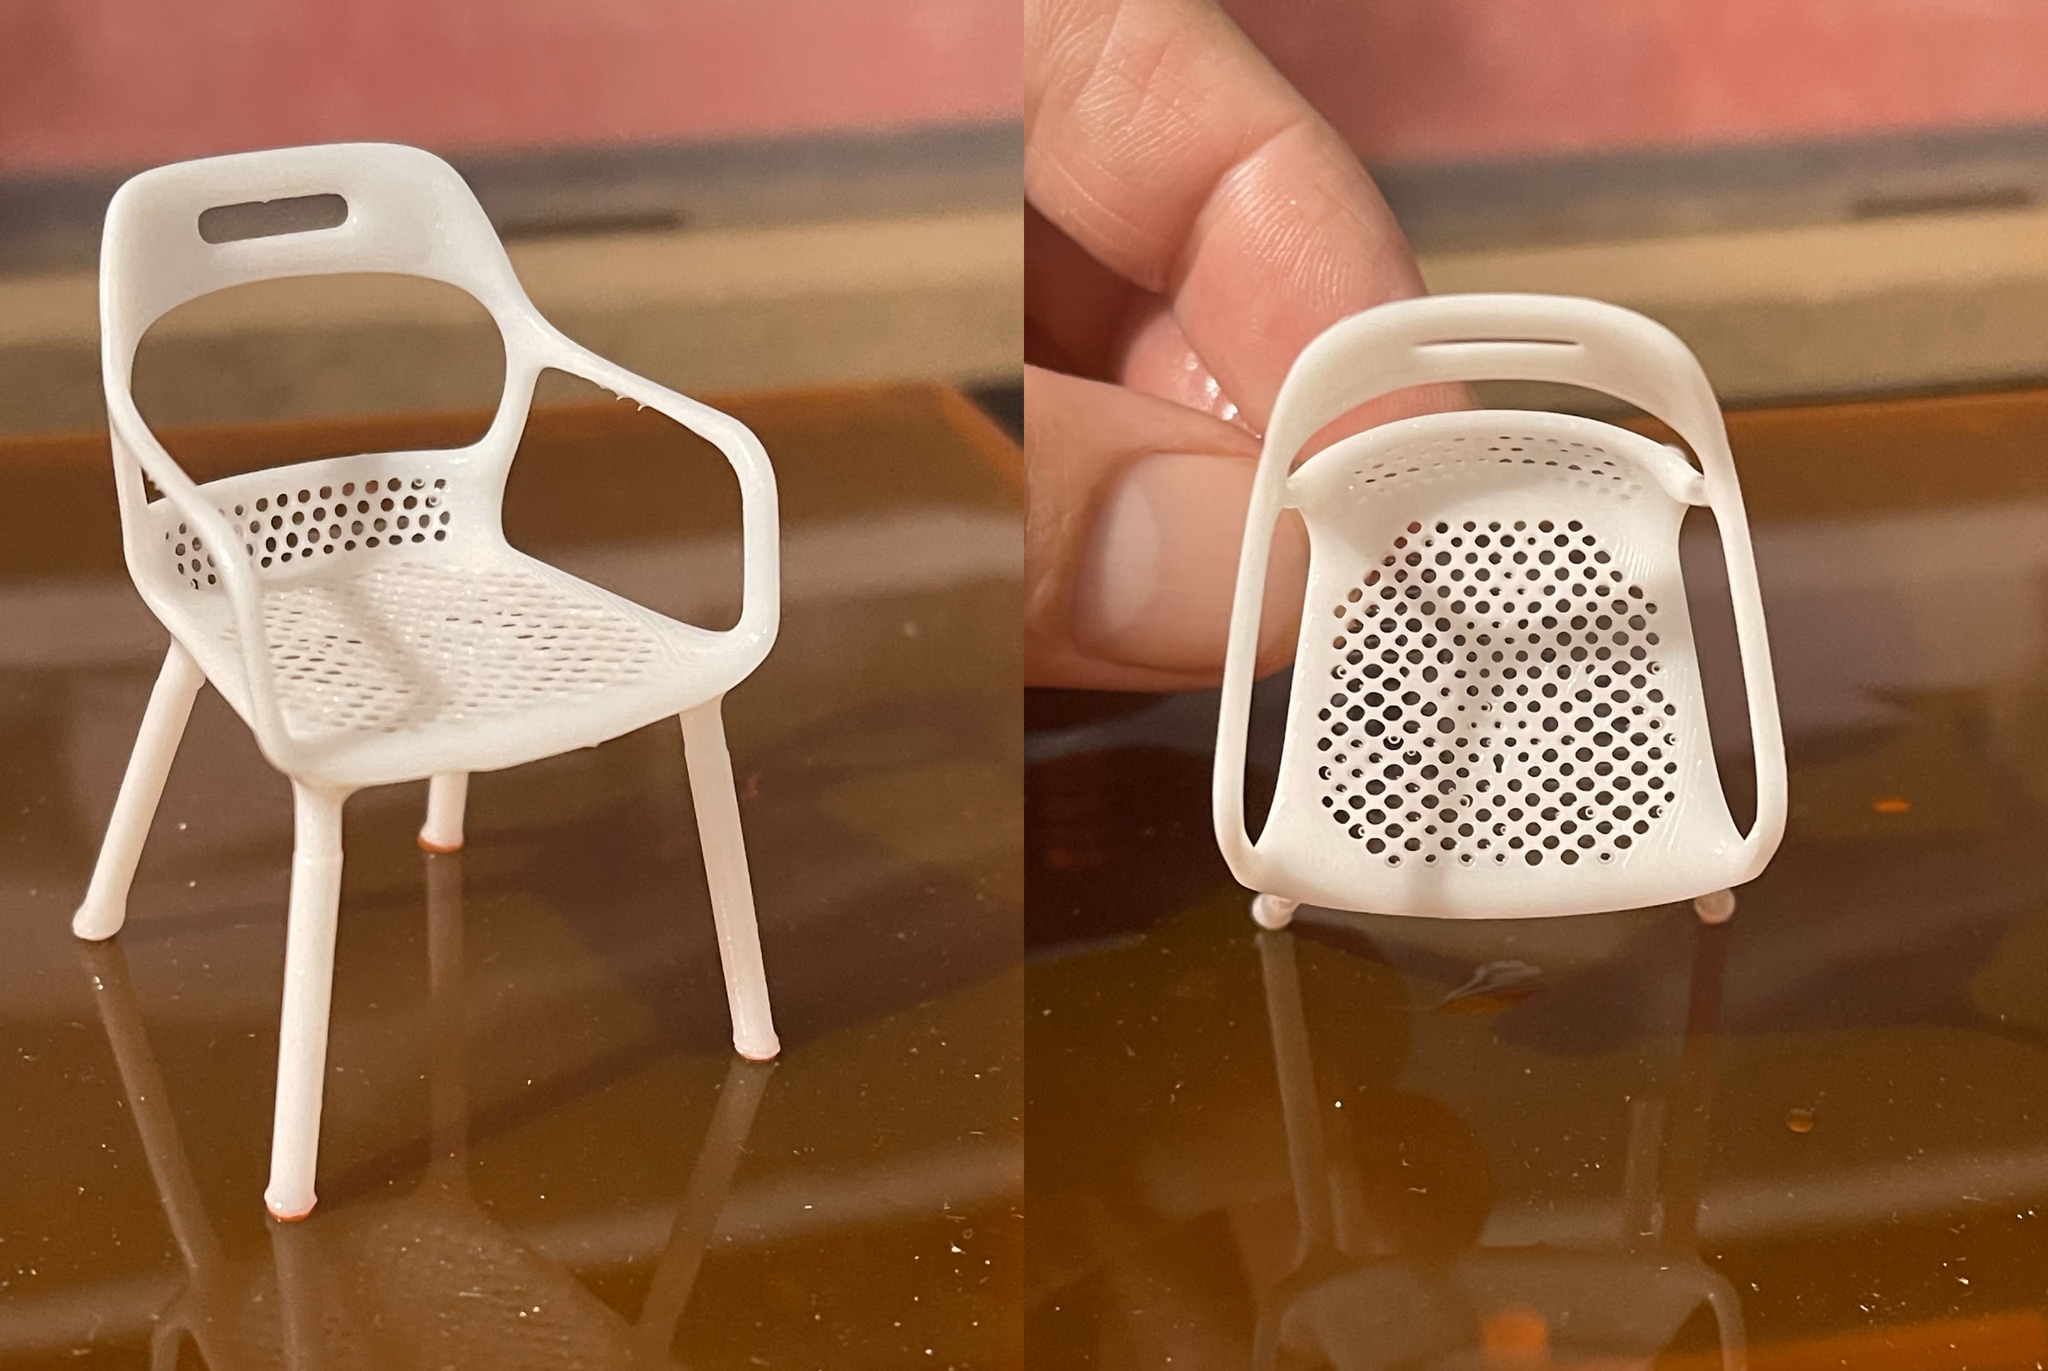
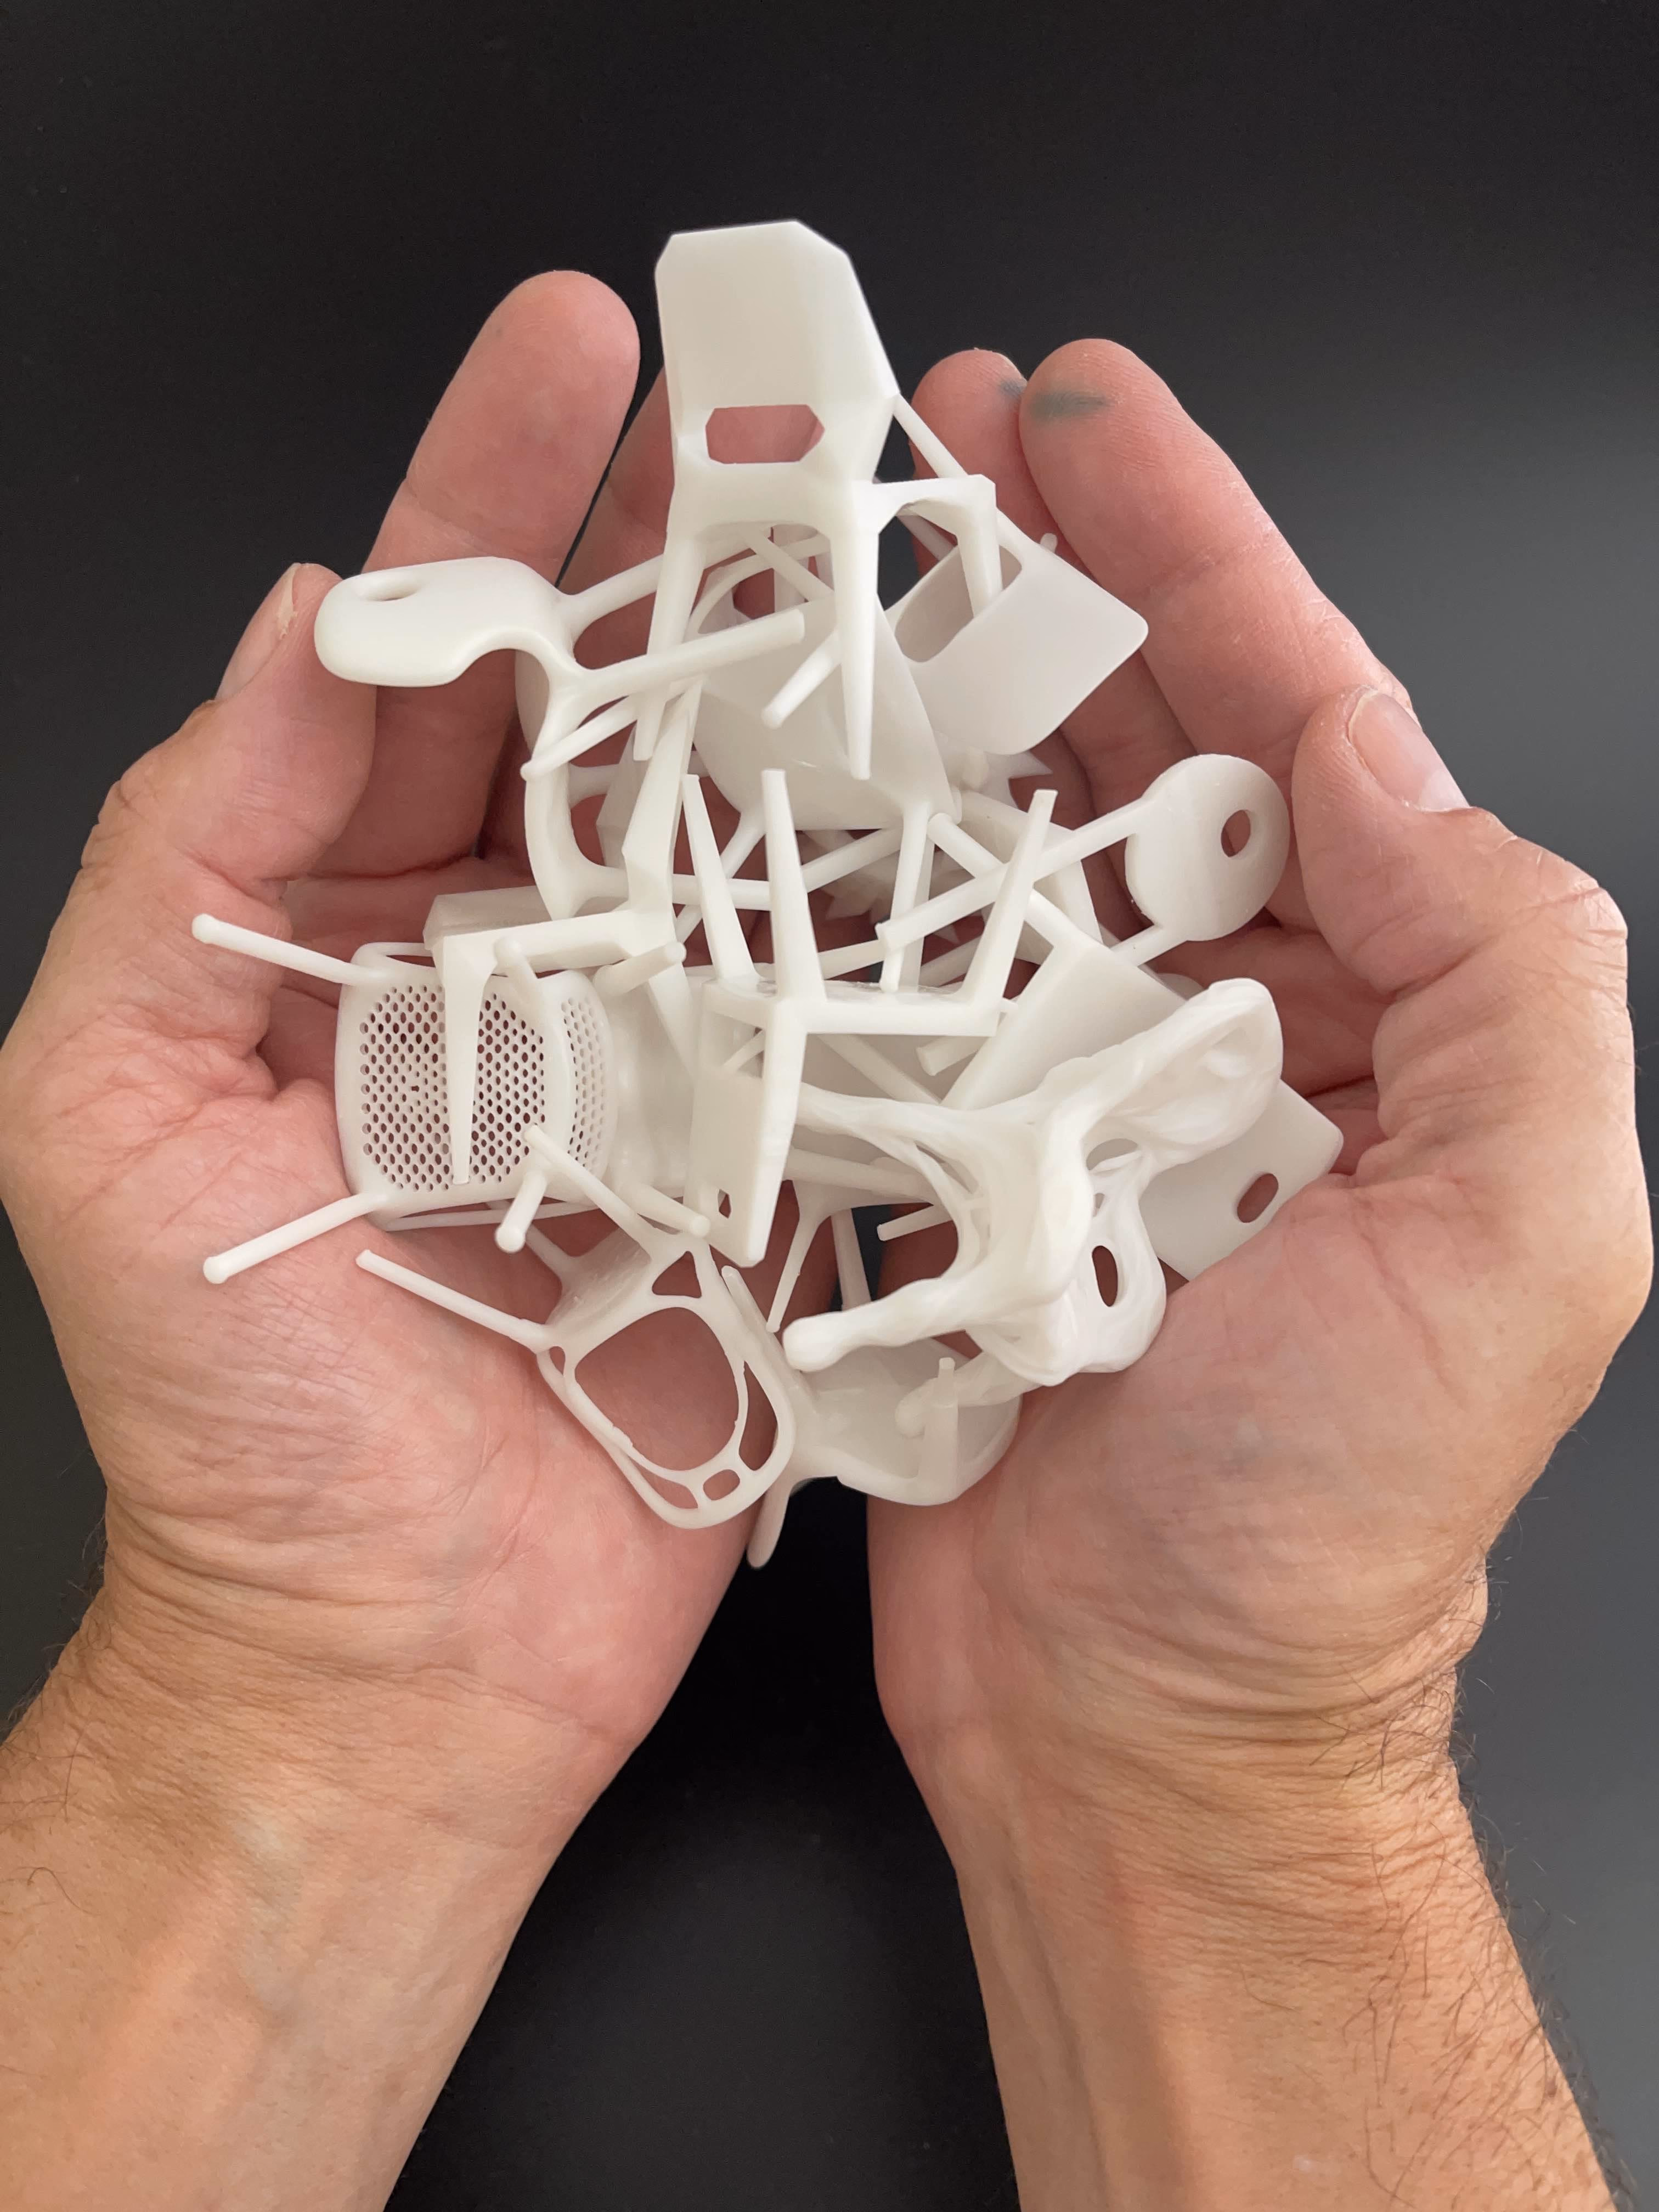
Claas didn’t stop at renderings. He 3D printed many of the variations using a budget-friendly resin printer. Even the most experimental models came out clean, detailed, and print-ready.
“The meshes are truly cool. This will be fun to 3D print.”
With painted edits and prompt-generated variations, Claas used Create 3D again to convert new ideas back into meshes. This loop allowed him to shift between form exploration and real 3D geometry without ever leaving Vizcom.
Why This Matters
Claas’s workflow shows that Vizcom isn’t just a tool for rendering or modeling. It’s a space for idea generation, style evolution, and playful experimentation. It lets designers remix reality into dozens of possibilities in minutes.
For students, educators, and creative professionals, this is a powerful way to test ideas, explore form, and expand your visual vocabulary.

Want to Try It?
To recreate a workflow like this, you’ll need:
- 3 to 5 images of an object from different angles
- Vizcom Pro (for 3D creation, Live Render, Modify, and Enhance)
- A few descriptive prompts
- And a willingness to explore
▶️ Watch Claas’s full walkthrough and see how each chair came to life
👉 Try Vizcom Today : https://app.vizcom.com/
Final Thought
This wasn't about just modeling a chair. It was about what happens when you let Vizcom become your creative collaborator. Claas didn’t chase perfection. He chased possibilities. And Vizcom made that process fast, expressive, and fun.
Explore
Explore more blog posts & resources to get inspired
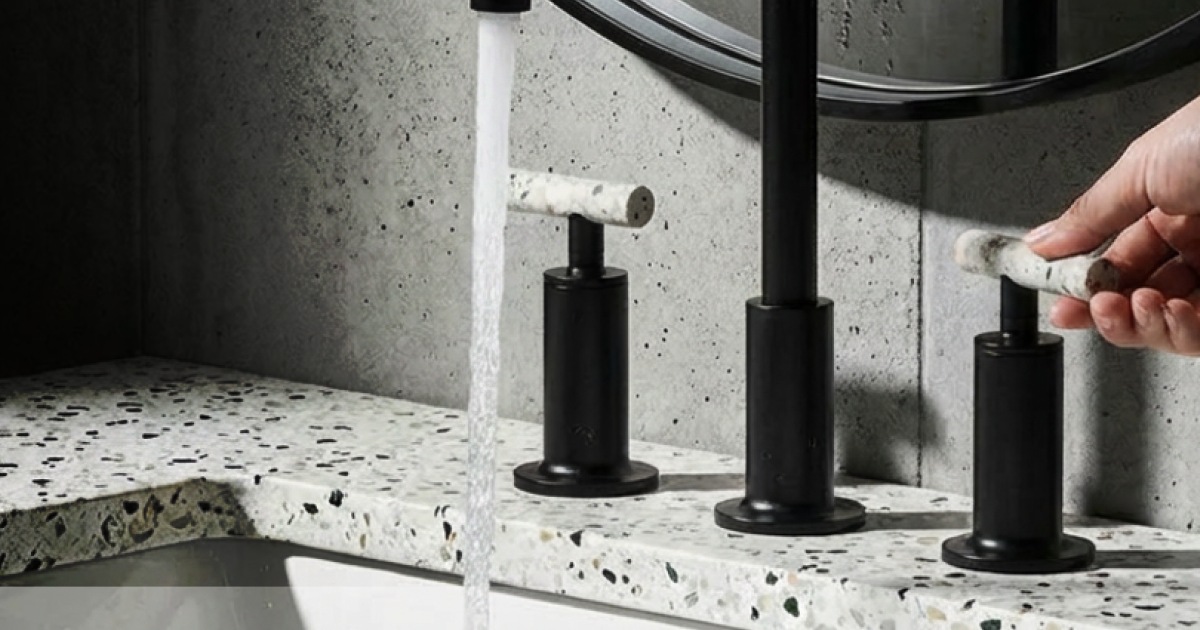
See how Kohler's industrial design team uses Vizcom to save time, speed up workflows, and create better work.
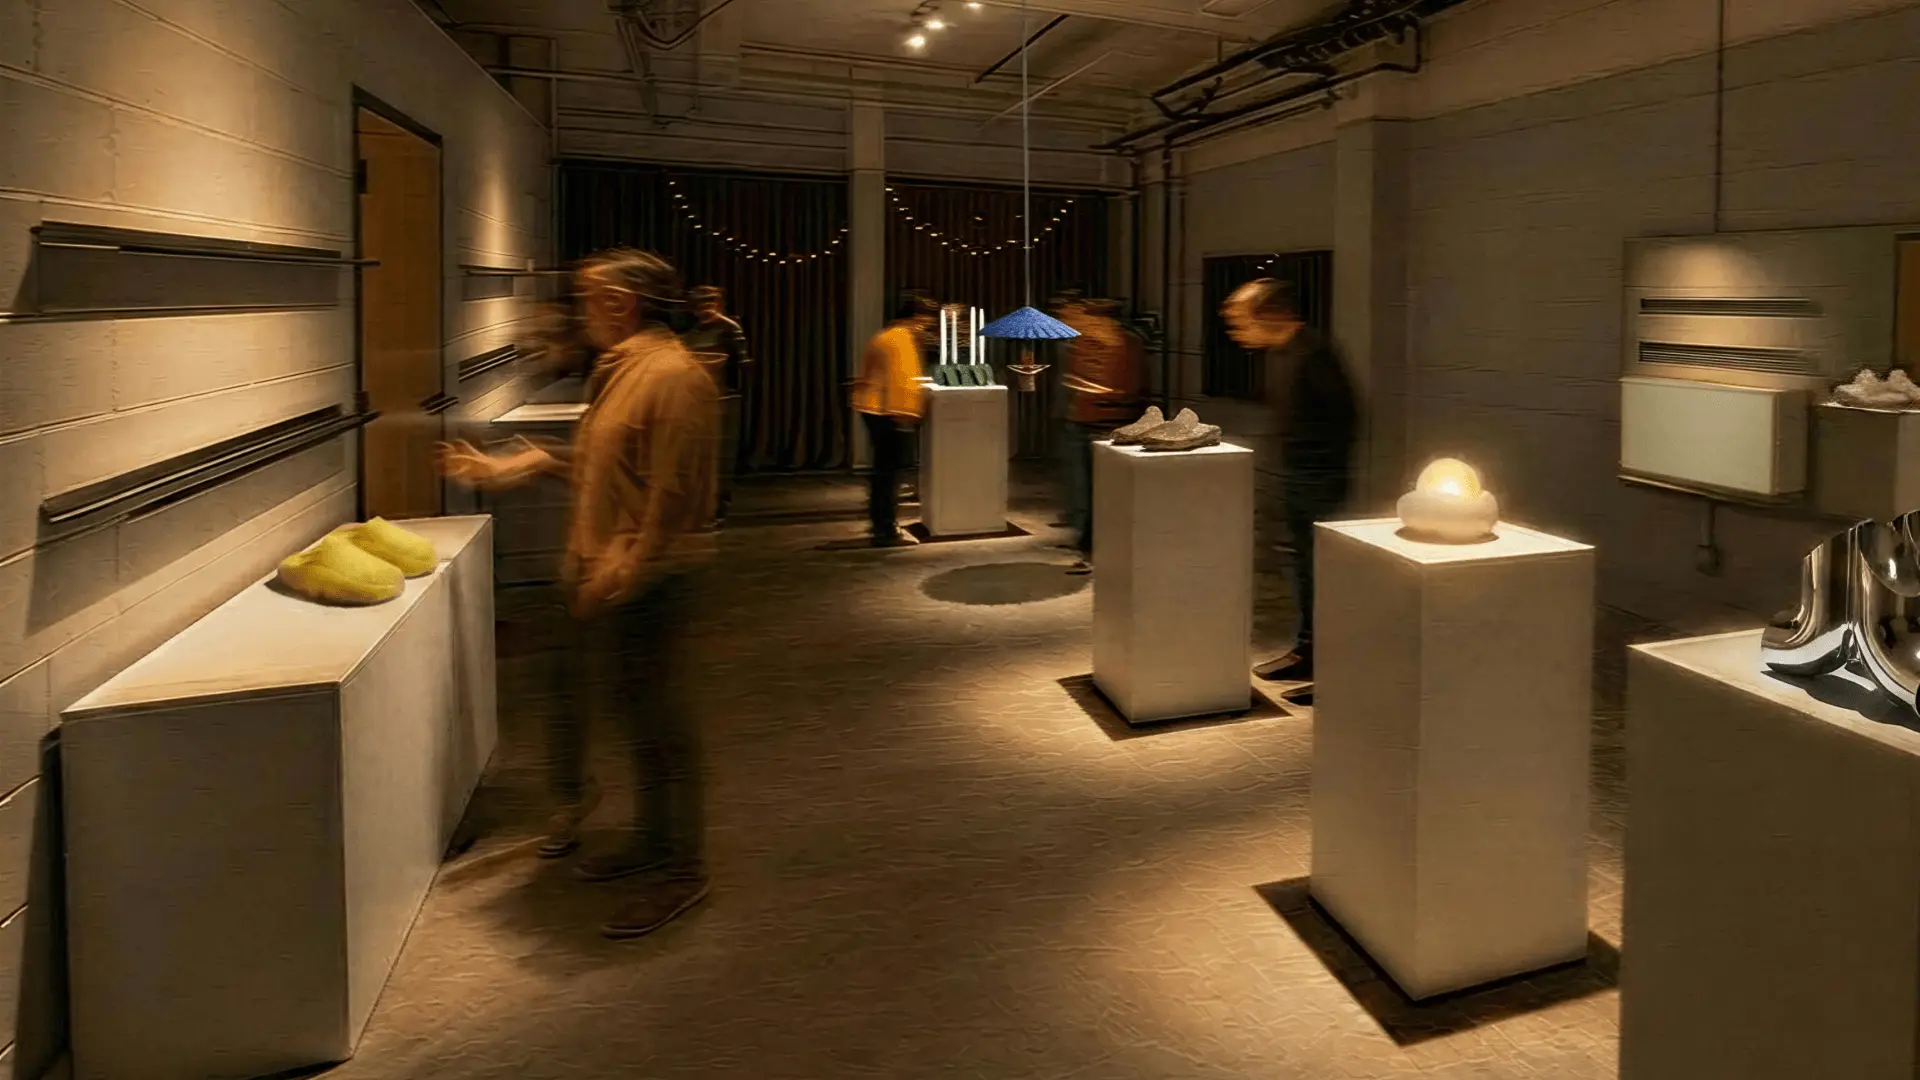
Explore the designs of Vizcom's San Francisco Design Week exhibition where furniture, footwear, lighting, and automotive concepts come to life through AI-powered visualization. Follow along as designers share the stories, sketches, and tools behind every piece on display.
Frequently asked questions
Yes of course! Our starter plan is completely free, no credit card required. This is a great plan to explore vizcom with.
We accept all major credit and debit cards.
Admins (paid) – can edit files, manage workspace settings, billing, teams, and invite members. Editors (paid) – can edit files but not manage settings, billing, or teams. Viewers (free) – can only view files in read-only mode.
Team billing is handled centrally by the Admin. All paid seats, whether Admins or Editors, are included in a single invoice under the same billing cycle, while Viewers remain free and do not affect the cost.
Yes, you can. An Admin can update the plan in the billing settings, and the switch will take effect on the next billing cycle at the annual rate.
Yes, you own everything you create in Vizcom. For free users, while Vizcom may use generated images to improve its services, it does not claim ownership of your designs, concepts, or original ideas—you keep full rights to them. For paid users, your images and designs remain entirely private and are only used to deliver the service. Every design, concept, and image you create or upload is fully yours and kept confidential.
Vizcom does not use your data to train AI models if you’re on a paid plan. Everything you create stays private and is only used to provide the service. Free users may have their generated images included to help improve Vizcom’s services, but even then, Vizcom does not claim ownership of your designs, concepts, or original ideas—you retain full rights.